在FreeBSD 11里安装apache24 - wordpress5 - varnish5 - hitch
过程:
1.安装好apache24,站点szt.anqun.org安装好wordpress程序,运行在8080端口
2.pkg install varnish5 # 安装 varnish
3.sysrc varnishd_enable=YES # 启用 varnishd 服务
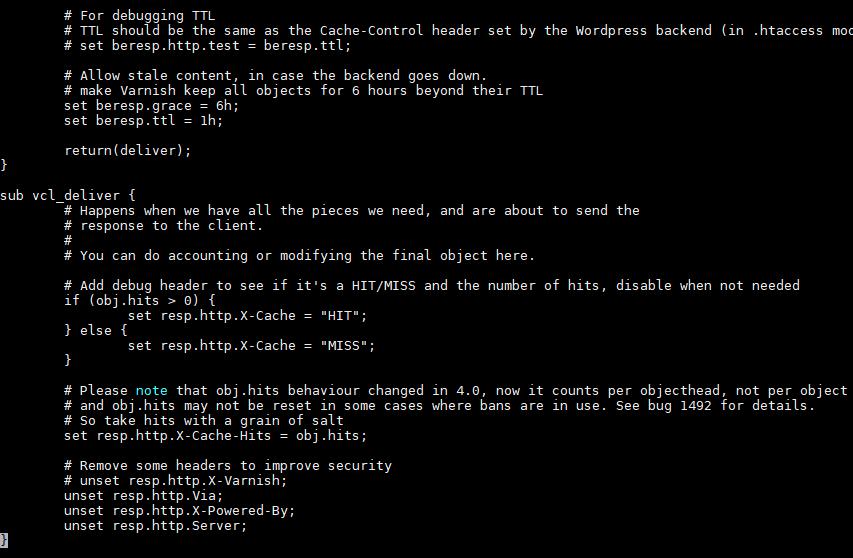
4.sysrc varnishd_config="/usr/local/etc/varnish" # 添加 varnishd 服务的配置文件,举例文件在这里:https://github.com/pranksinatra/gc-varnish-config/blob/master/default.vcl,视需求添加 set beresp.ttl = 1h; 及是否保留 unset resp.http.X-Varnish; 
4.pkg install hitch # 安装 hitch ,让它提供https
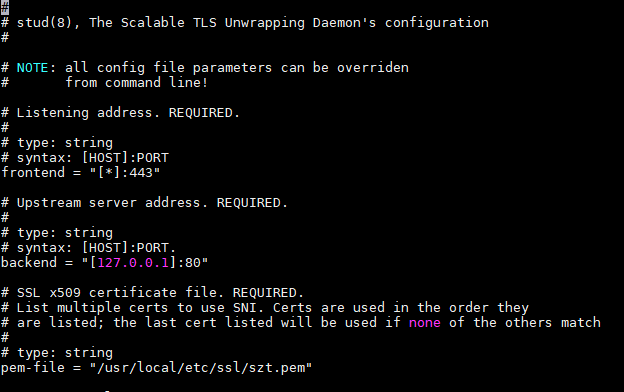
5.vi /usr/local/etc/hitch # 编辑hitch配置文件,根据需求更改端口,本例是监听443端口,后端是varnishd的80端口
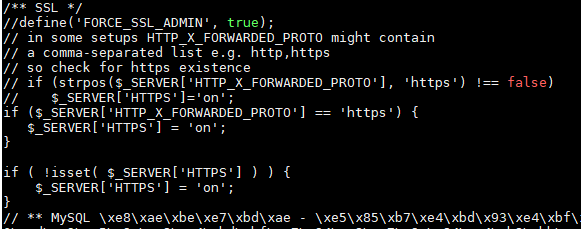
6.如wordpress后台https访问出现跳转循环,请在wp-config.php里添加:
if ($_SERVER['HTTP_X_FORWARDED_PROTO'] == 'https') {
   $_SERVER['HTTPS'] = 'on';
}

if ( !isset( $_SERVER['HTTPS'] ) ) {
    $_SERVER['HTTPS'] = 'on';
}
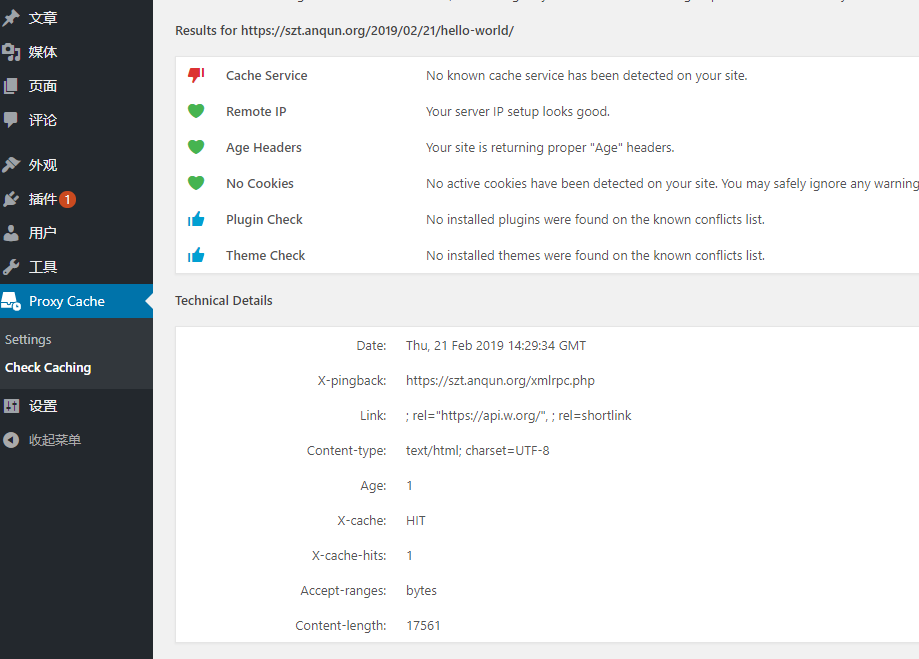
7.可以安装wordpress插件,如Proxy Cache来管理缓存
参考:
- https://micahjon.com/2017/getting-setup-with-wordpress-varnish-5-and-ssl/
- https://github.com/admingeekz/varnish-wordpress/blob/master/default.vcl
- https://www.vultr.com/docs/install-varnish-cache-5-with-nginx-on-freebsd-11
- https://www.linode.com/docs/websites/varnish/use-varnish-and-nginx-to-serve-wordpress-over-ssl-and-http-on-debian-8/
- http://varnish-cache.org/releases/install_freebsd.html
- https://serverfault.com/questions/933659/wordpress-err-too-many-redirects-through-varnish-but-not-through-apache
- https://wordpress.stackexchange.com/questions/170165/wordpress-wp-admin-https-redirect-loop