分类 阿里云 下的文章

在 Windows 2008 系统为 phpstudy apache 不同网站配置不同SSL证书(SNI)

有云友提问,想为 phpstudy 套件里的 apache 配置SSL证书安全访问。

环境:Windows 2008 32位系统 , phpstudy 2016(apache 2.4)

过程:

1.下载,解压,初始化好 phpstudy
bbs-aliyun-dongshan3-304092-1.png

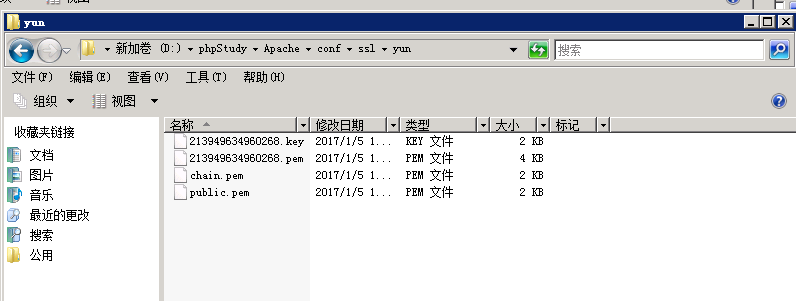
2.将下载好的证书放到apache目录下,如我将yun.anqun.org的SSL证书保存在apache/conf/ssl/yun里
bbs-aliyun-dongshan3-304092-2.png

3.通过phpstudy的管理菜单,编辑 httpd.conf 配置文件,将约在489行的,关于ssl配置的文件启用;
Include conf/extra/httpd-ssl.conf
bbs-aliyun-dongshan3-304092-3.png

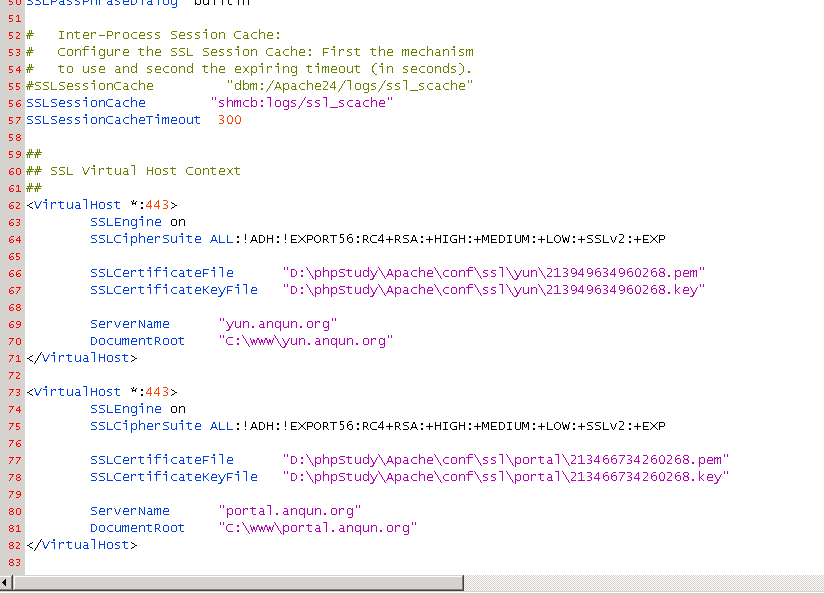
4.编辑 httpd-ssl.conf 文件,按实际情况配置虚拟主机的ssl内容,如本例里的 yun.anqun.org 及 portal.anqun.org 的简要配置内容如下:

##
## SSL Virtual Host Context
##
<VirtualHost *:443>
        SSLEngine on
        SSLCipherSuite ALL:!ADH:!EXPORT56:RC4+RSA:+HIGH:+MEDIUM:+LOW:+SSLv2:+EXP
        SSLCertificateFile      "D:\phpStudy\Apache\conf\ssl\yun\213949634960268.pem"
        SSLCertificateKeyFile   "D:\phpStudy\Apache\conf\ssl\yun\213949634960268.key"
        ServerName      "yun.anqun.org"
        DocumentRoot    "C:\www\yun.anqun.org"
</VirtualHost>
<VirtualHost *:443>
        SSLEngine on
        SSLCipherSuite ALL:!ADH:!EXPORT56:RC4+RSA:+HIGH:+MEDIUM:+LOW:+SSLv2:+EXP
        SSLCertificateFile      "D:\phpStudy\Apache\conf\ssl\portal\213466734260268.pem"
        SSLCertificateKeyFile   "D:\phpStudy\Apache\conf\ssl\portal\213466734260268.key"
        ServerName      "portal.anqun.org"
        DocumentRoot    "C:\www\portal.anqun.org"
</VirtualHost>

bbs-aliyun-dongshan3-304092-4.png

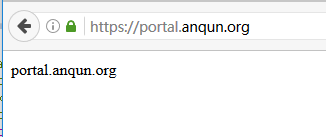
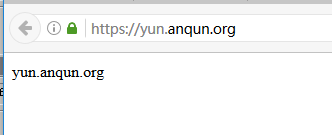
5.保存配置文件后,重启apache,在火狐浏览器里测试访问,显示结果正常
bbs-aliyun-dongshan3-304092-5.png

bbs-aliyun-dongshan3-304092-6.png

参考:https://httpd.apache.org/docs/2.4/ssl/ssl_howto.html

在 Debian 8系统 为 nginx 不同网站配置不同SSL证书(SNI)

看到有云友想为站点配置https访问,本例实践一下:

环境:Debian 8 64位,nginx

目的:为两个站点(yun.anqun.org, portal.anqun.org)配置https访问。

前提:已经安装好了Web(nginx)和在阿里云申请下载了相应的SSL证书。

过程:

1.Debian 8 系统软件库中的nginx支持SNI功能
bbs-aliyun-dongshan3-303963-1.png

2.将站点SSL证书上传到合适的目录,如将.pem文件上传到 /etc/ssl/certs , 将.key文件上传到 /etc/ssl/private 目录。一般需将key文件设置为仅root可读写。
bbs-aliyun-dongshan3-303963-2.png

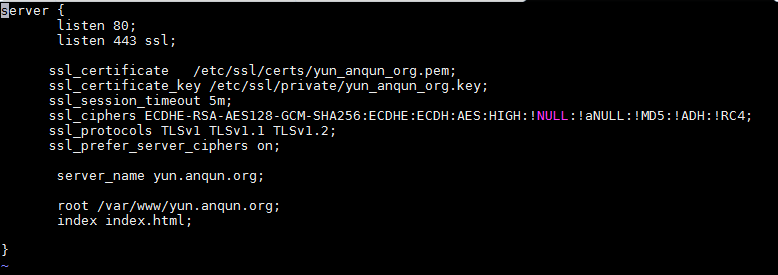
3.编辑站点yun.anqun.org的配置文件,增加SSL监听端口及证书路径,如本例站点yun.anqun.org的配置文件内容如下:

server {
       listen 80;
       listen 443 ssl;
      ssl_certificate   /etc/ssl/certs/yun_anqun_org.pem;
      ssl_certificate_key /etc/ssl/private/yun_anqun_org.key;
      ssl_session_timeout 5m;
      ssl_ciphers ECDHE-RSA-AES128-GCM-SHA256:ECDHE:ECDH:AES:HIGH:!NULL:!aNULL:!MD5:!ADH:!RC4;
      ssl_protocols TLSv1 TLSv1.1 TLSv1.2;
      ssl_prefer_server_ciphers on;
          
       server_name yun.anqun.org;
       root /var/www/yun.anqun.org;
       index index.html;
}

bbs-aliyun-dongshan3-303963-3.png

4.重新加载 nginx 服务,在Chrome浏览器里测试,正常显示https站点内容
bbs-aliyun-dongshan3-303963-4.png

bbs-aliyun-dongshan3-303963-5.png

参考:http://nginx.org/en/docs/http/configuring_https_servers.html

在Windows 2012 web服务器IIS 为不同网站配置不同SSL证书(SNI)

现在阿里云可以免费提供可用于设置https站点的SSL证书,且新版本的Web服务端通过SNI功能支持在同一个IP里设置多个https站点。

本例以Windows 2012 Web服务器IIS,为两个站点 portal.anqun.org 和 yun.anqun.org 配置(绑定)https。

前提条件:假设服务器已经安装好了Web服务角色,且新建好了站点; 已经从阿里云证书服务中下载到了相应的适合“IE8”的SSL证书。

步骤:

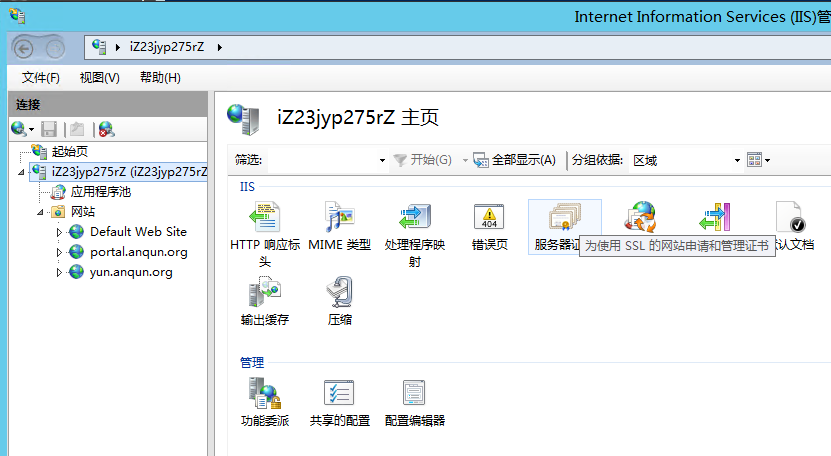
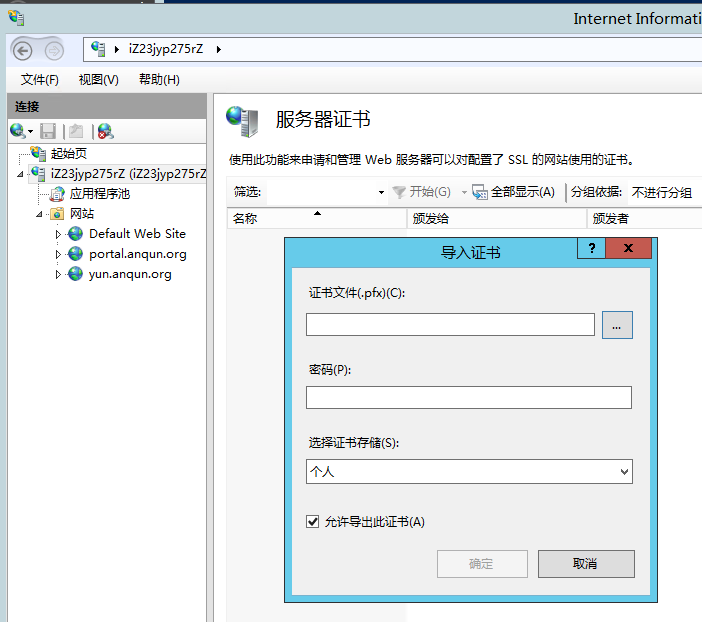
1.在IIS主页,点击“服务器证书”图标
bbs-aliyun-dongshan3-303904-1.png

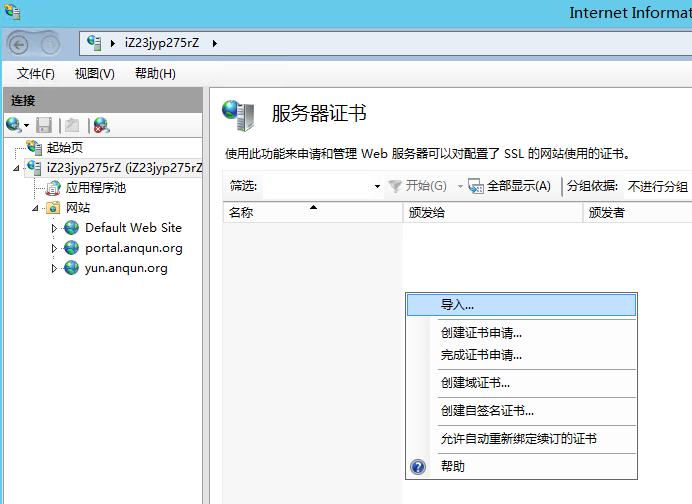
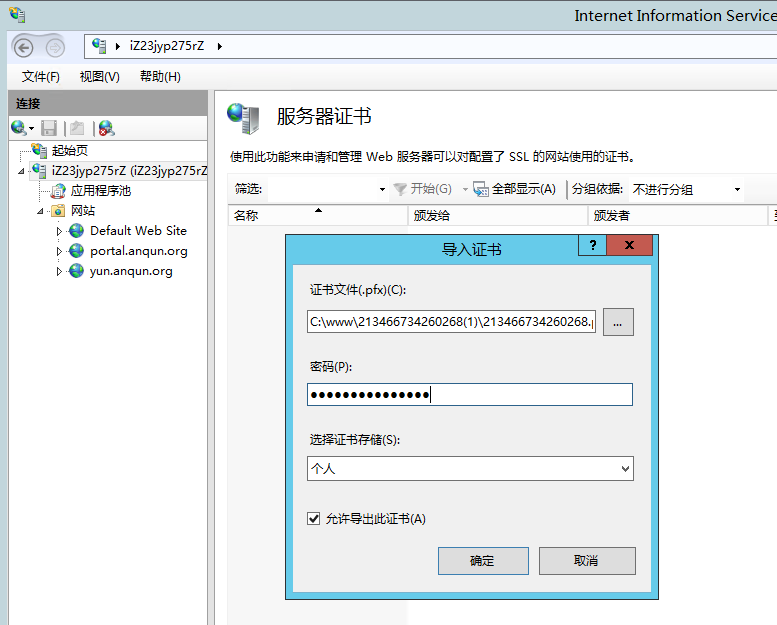
2.在“服务器证书”页中,鼠标右击,选择“导入”,弹出“导入证书”对话框
bbs-aliyun-dongshan3-303904-2.png

bbs-aliyun-dongshan3-303904-3.png

3.在“导入证书”对话框里选择准备好的.pfx文件
bbs-aliyun-dongshan3-303904-4.png

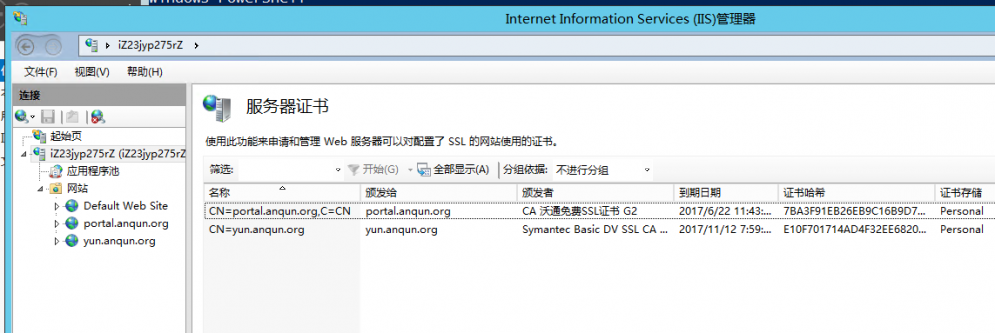
4.完成导入后,会显示成功导入的证书信息
bbs-aliyun-dongshan3-303904-5.png

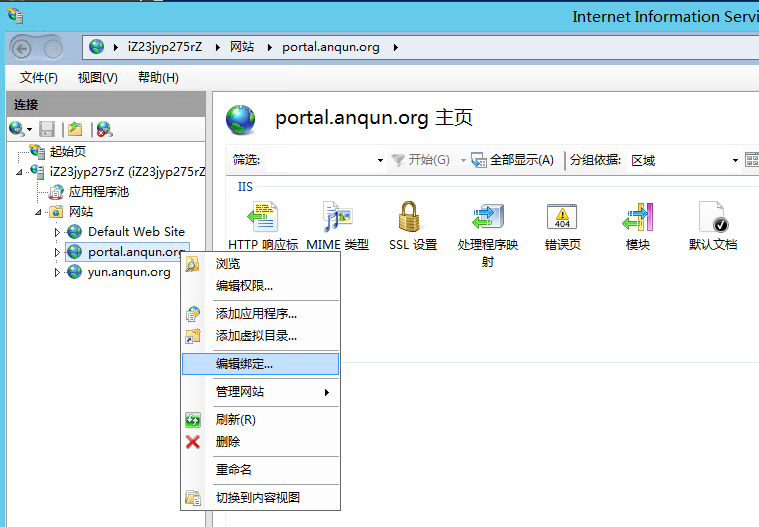
5.转到相应的站点,如鼠标右击 portal.anqun.org ,选择“编辑绑定”
bbs-aliyun-dongshan3-303904-6.png

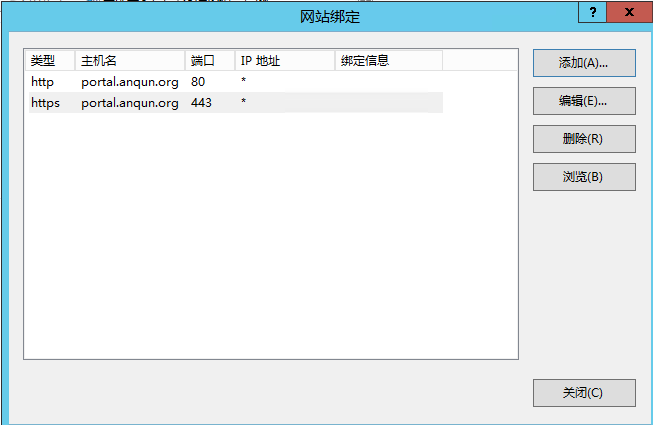
6.在“网站绑定”对话框里,点击“添加”按钮
bbs-aliyun-dongshan3-303904-6.png

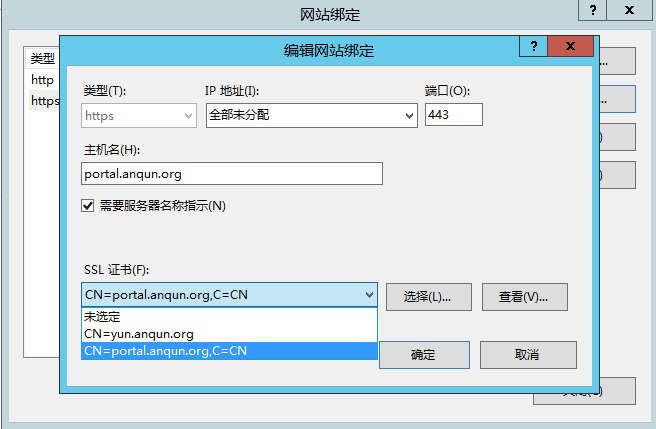
7.在“编辑网站绑定”对话框里,选择“https”的类型,勾选“需要服务器名称指示”,在“SSL证书”里选择相应的证书
bbs-aliyun-dongshan3-303904-8.png

bbs-aliyun-dongshan3-303904-9.png

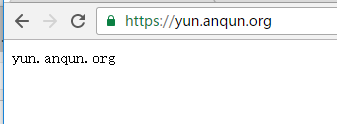
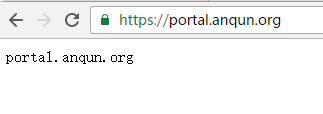
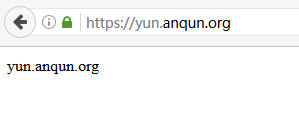
8.在火狐浏览器里分别浏览https站点,显示正常
bbs-aliyun-dongshan3-303904-10.png

参考:https://www.iis.net/learn/get-started/whats-new-in-iis-8/iis-80-server-name-indication-sni-ssl-scalability

在Debian 7系统里测试安装Ambra

感谢 tctia* 的支持。

有用户要求测试安装Ambra,现将过程记录,虽然未成功,但希望给其他人带来帮助。

环境:
软件:Debian 7.10 64位,JDK 7,tomcat 6,mysql server 5.5。
ECS配置:1核心,2GB内存。

个人总结:

  • Ambra官方网站里的文档相对较旧,很久没更新了
  • Ambra官方网站里提供的联系方法(邮件列表)无人审核,无法发邮件提问,获取帮助
  • Java生手(如我),不建议尝试,在前面两个原因前提下,完成测试有难度

过程:

1.更新软件源:
apt-get update

2.安装默认JDK版本(1.7.0_111)
apt-get install default-jdk

3.安装tomcat6
apt-get install tomcat6

4.安装mysql,假设设置mysql的密码为root
apt-get instal mysql-server

5.停止 tomcat6 服务,移走原有/var/lib/tomcat/webapps目录内容
service tomcat6 stop

6.用官方上手教程里方法,编译的webapp版本是2.9.5,官方PLOS支是2.11,这里下载官方编译好的2.11.war来测试,放到 /var/lib/tomcat/webapps/ROOT.war

wget http://ambraproject.org/maven2/release/org/ambraproject/ambra-webapp/2.11.0/ambra-webapp-2.11.0.war

7.从官方上手教程里下载相应的组件,如 tomcat-jdbc.jar, tomcat-juli.jar, log4j-1.2.14.jar 到 /usr/share/tomcat6/lib 目录(前两者是mysql连接要用到的,后边的是用于记录日志的),同时在该目录里创建log4j.properties的配置文件,让tomcat记录详细的输出信息

log4j.rootLogger=ERROR,consoleAppender
log4j.appender.consoleAppender=org.apache.log4j.ConsoleAppender
log4j.appender.consoleAppender.Target=System.out
log4j.appender.consoleAppender.layout=org.apache.log4j.PatternLayout
log4j.appender.consoleAppender.layout.ConversionPattern=%-5p %c{1} - %m%n
log4j.logger.org.ambraproject=DEBUG
log4j.logger.org.ambraproject.ambra.configuration=FATAL

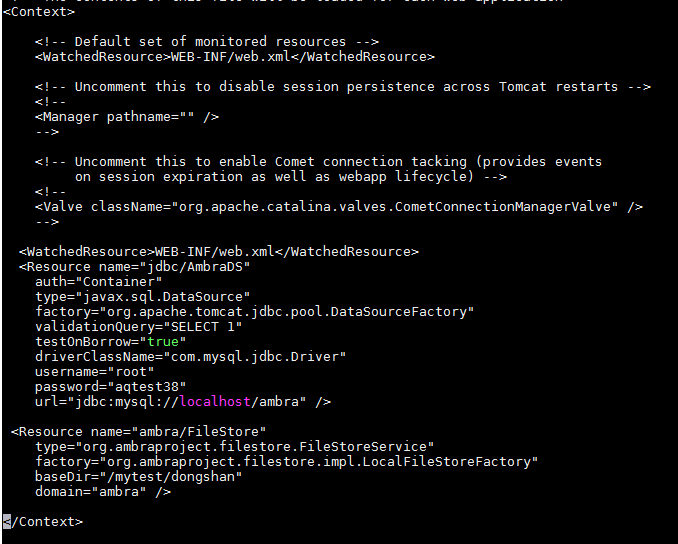
8.编辑tomcat配置文件,/etc/tomcat6/context.xml ,在标签间加入以下内容,其中 jdbc:mysql://localhost/ambra 中的 ambra 是程序要用到的数据库名称,上一行的password是数据库用户的密码,路径 /mytest/dongshan/ambra 是程序要用到的文件路径,这里随意创建了 /mytest/dongshan 的路径,请作相应的更改

<WatchedResource>WEB-INF/web.xml</WatchedResource>
  <Resource name="jdbc/AmbraDS"
    auth="Container"
    type="javax.sql.DataSource"
    factory="org.apache.tomcat.jdbc.pool.DataSourceFactory"
    validationQuery="SELECT 1"
    testOnBorrow="true"
    driverClassName="com.mysql.jdbc.Driver"
    username="root"
    password="aqtest38"
    url="jdbc:mysql://localhost/ambra" />
<Resource name="ambra/FileStore"
    type="org.ambraproject.filestore.FileStoreService"
    factory="org.ambraproject.filestore.impl.LocalFileStoreFactory"
    baseDir="/mytest/dongshan"
    domain="ambra" />
bbs-aliyun-dongshan3-303673-1.png

9.创建好空数据库 ambra,导入从官方“上手教程”里的 ambra_schema.sql 数据库文件

10.创建ambra的配置文件,/etc/ambra/ambra.xml ,内容如下。这里主要是设置文件(ehcache.xml)和目录(ingest、ingestdestination、AmbraJournal和templates)的路径, 还有默认杂志名称(AmbraJournal),请根据实际情况修改:

<config>
  <ambra>
    <network>
      <hosts>
        <default>localhost</default>
        <ambra>${ambra.network.hosts.default}</ambra>
      </hosts>
    </network>
    <services>
      <ehcache>
        <configFileLocation>/mytest/dongshan/ehcache.xml</configFileLocation>
      </ehcache>
      <search>
        <server>
          <url>http://localhost:8080/solr</url>
        </server>
      </search>
      <documentManagement>
        <ingestSourceDir>/mytest/dongshan/ingest</ingestSourceDir>
        <ingestDestinationDir>/mytest/dongshan/ingestdestination</ingestDestinationDir>
      </documentManagement>
    </services>
    <virtualJournals>
      <templateDir>/mytest/dongshan/templates</templateDir>
      <default>AmbraJournal</default>
      <journals>AmbraJournal</journals>
    </virtualJournals>
  </ambra>
</config>

11.创建杂志目录(/mytest/dongshan/templates/journals/AmbraJournal/webapp)及配置文件,如 /mytest/dongshan/templates/journals/AmbraJournal/configuration/journal.xml,内容如下:

<?xml version="1.0" encoding="UTF-8" ?>
<!--
  This file is the Ambra template for the Default AmbraJournal journal
-->
<config>
  <ambra>
    <!-- virtual journal config -->
    <virtualJournals>
      <AmbraJournal>
        <journal>AmbraJournal</journal>
        <eIssn>1111-2222</eIssn>
        <description>Ambra</description>
        <rules>
          <host>.*ambra.*</host>
        </rules>
        <url>http://ambrajournal.example.org</url>
        <!-- Does the journal have a taxonomy browser? -->
        <taxonomyBrowser>false</taxonomyBrowser>
        <ambra>
          <services>
            <feed>
              <title>Ambra Journal</title>
              <id>info:doi/10.1371/feed.ambr</id>
            </feed>
          </services>
        </ambra>
        <!-- Configuration keys for displaying recent articles tab widget on home page -->
        <recentArticles>
          <numDaysInPast>14</numDaysInPast>
          <numArticlesToShow>5</numArticlesToShow>
          <typeUriArticlesToShow>
            <articleTypeUri>http://rdf.plos.org/RDF/articleType/Research%20Article</articleTypeUri>
          </typeUriArticlesToShow>
        </recentArticles>
        <isIncludeInCrossJournalSearch>false</isIncludeInCrossJournalSearch>
      </AmbraJournal>
    </virtualJournals>
    <freemarker>
      <!--
        # This section defines the various journals and the css and javascript files which should be
        # included on each page as well as the page title.  The values within the <default> tag are used
        # if any of the values are missing in the <page> definitions.  Note, that the title, css, and
        # javascript level values are entirely replaced, they are not additive.  Override config files
        # may define values for each of those three variables and they will supsercede values present
        # in subsequent config values.  The lookup for values is as follows:
        # 1. Page defined in journal
        # 2. Default value defined in journal
        # 3. Page defined in default journal
        # 4. Default value in default journal
        # To define an empty value for a certain page so that it doesn't use defaults, just put the
        # element tag with no value, e.g. <javascript></javascript>
      -->
      <!--AmbraJournal-->
      <journal>
        <name>AmbraJournal</name>
        <metaKeywords>Ambra\, Default\, Journal</metaKeywords>
        <metaDescription>Ambra Journal: Defaults</metaDescription>
        <articleTitlePrefix>Ambra Journal :</articleTitlePrefix>
        <displayName>Ambra Journal</displayName>
        <default>
          <title>Ambra Journal : An Open-Access, Semantic, Journal Publishing System</title>
          <css>
            <file>/css/global.css</file>
            <file>/css/lte_ie7.css</file>
          </css>
          <javascript>
            <file>/javascript/js.js</file>
          </javascript>
        </default>
        <page>
          <name>/index.ftl</name>
          <css>
            <file>/css/global.css</file>
            <file>/css/lte_ie7.css</file>
          </css>
          <javascript>
            <file>/javascript/jquery-1.8.1.js</file>
            <file>/javascript/global.js</file>
          </javascript>
        </page>
      </journal>
    </freemarker>
  </ambra>
</config>

12.如果tomcat6提示缺少co请在相应的镜像站点下载 commons-logging-1.2-bin.tar.gz,将解压出来commons-logging-1.2.jar的文件,放到tomcat的lib目录/usr/share/tomcat6/lib
wget http://apache.mirror.iweb.ca//commons/logging/binaries/commons-logging-1.2-bin.tar.gz

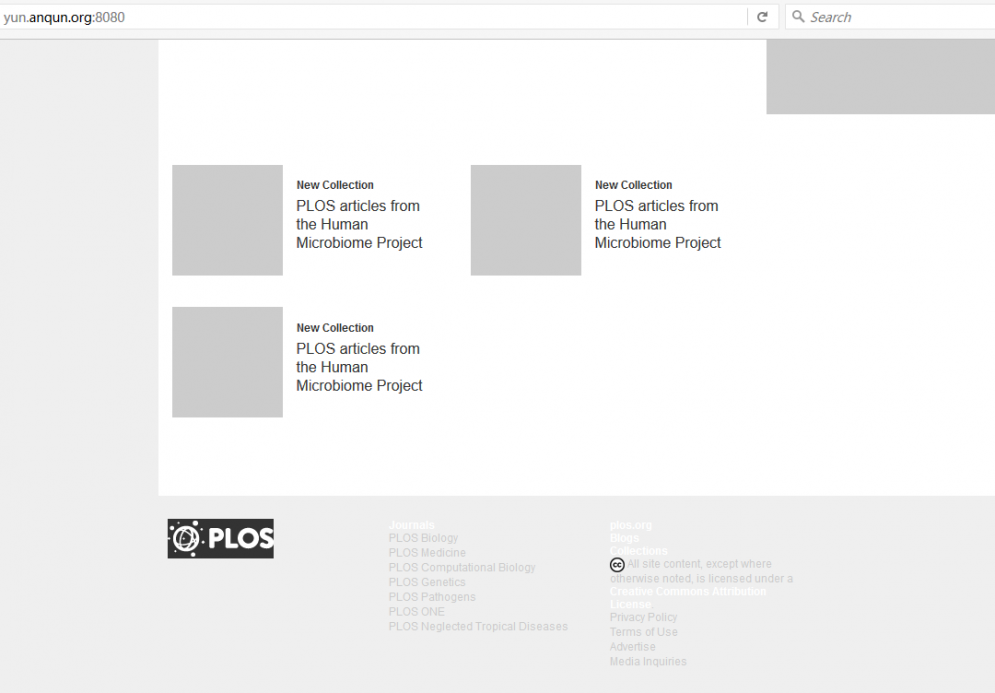
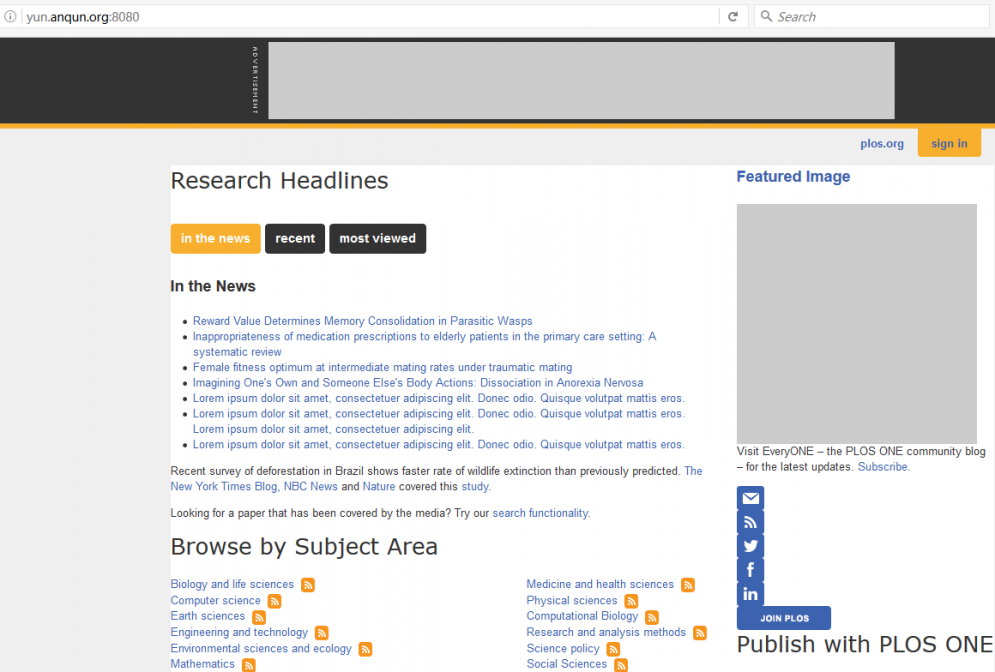
13.启动tomcat6,在浏览器访问,看测试结果:
service tomcat6 start
bbs-aliyun-dongshan3-303673-2.png

bbs-aliyun-dongshan3-303673-4.png

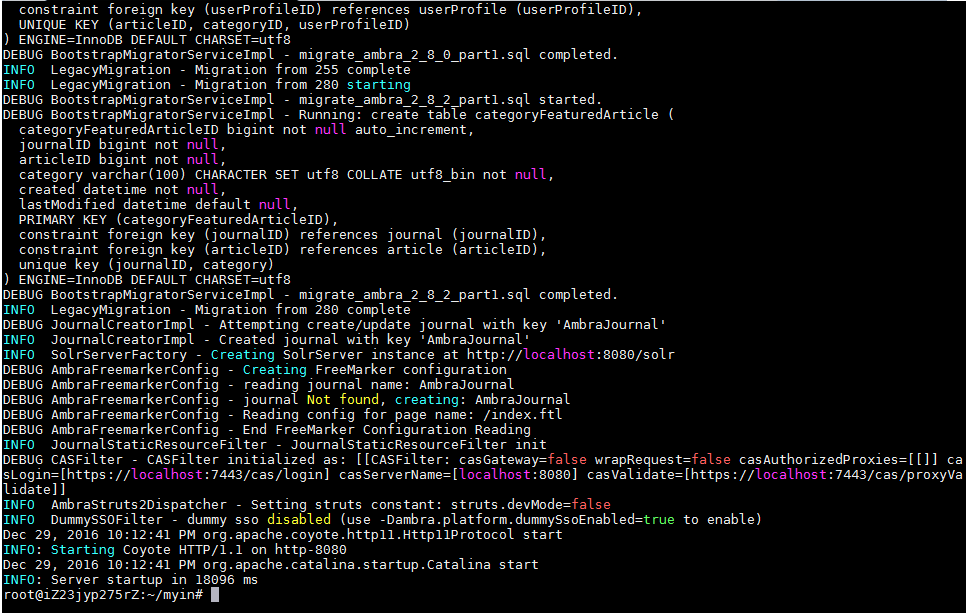
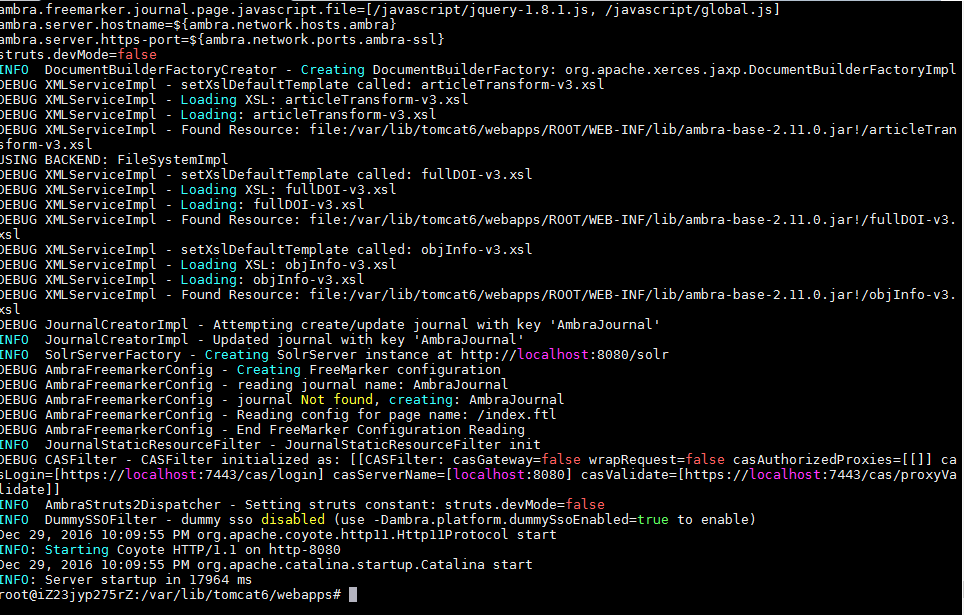
14.如浏览器显示404页面找不到,请查看tomcat日志:
tail -300 /var/log/tomcat6/catalina.out
bbs-aliyun-dongshan3-303673-5.png

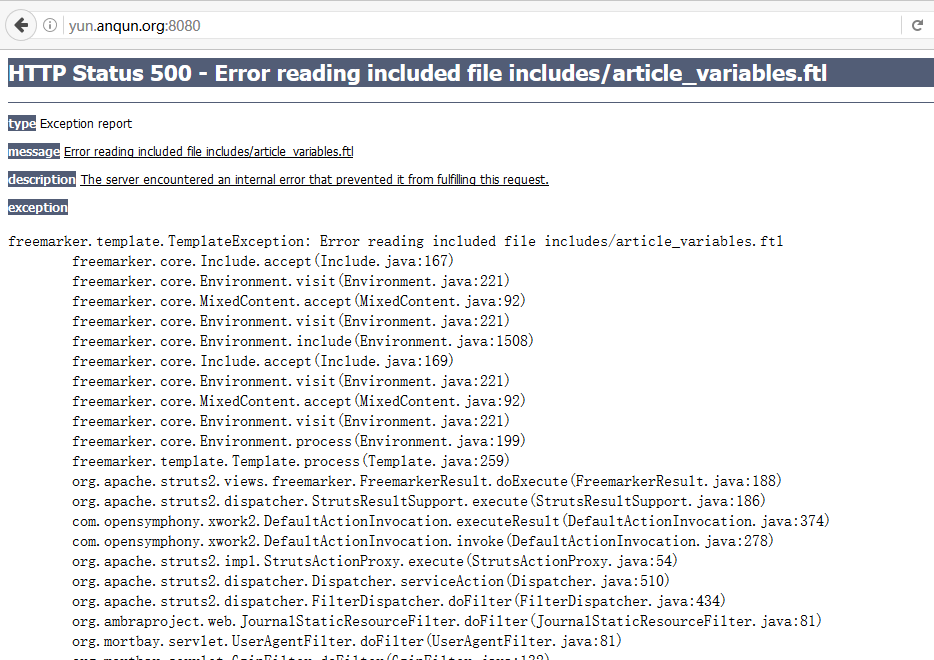
15.测试中,如果用官方PLOS树中的ambra-webapp-2.11.0.war,很可能会出现500错误,提示找不到 includes/article_variables.ftl 文件,我是直接将 /var/lib/tomcat6/webapps/ROOT/includes/global_variables.ftl 复制为 /var/lib/tomcat6/webapps/ROOT/includes/article_variables.ftl

freemarker.template.TemplateException: Error reading included file includes/article_variables.ftl
bbs-aliyun-dongshan3-303673-6.png

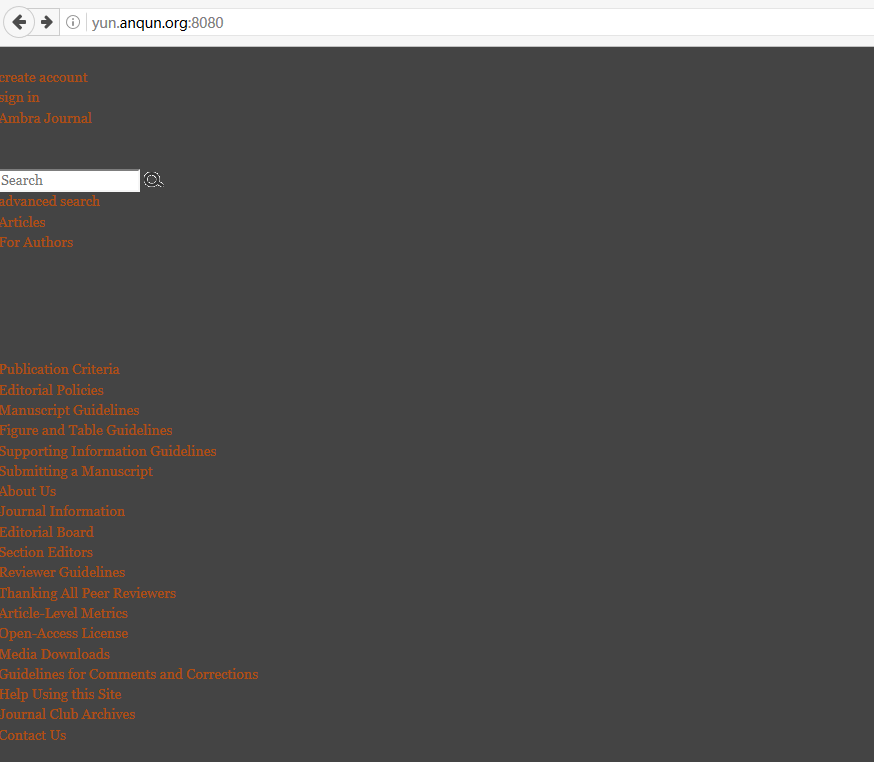
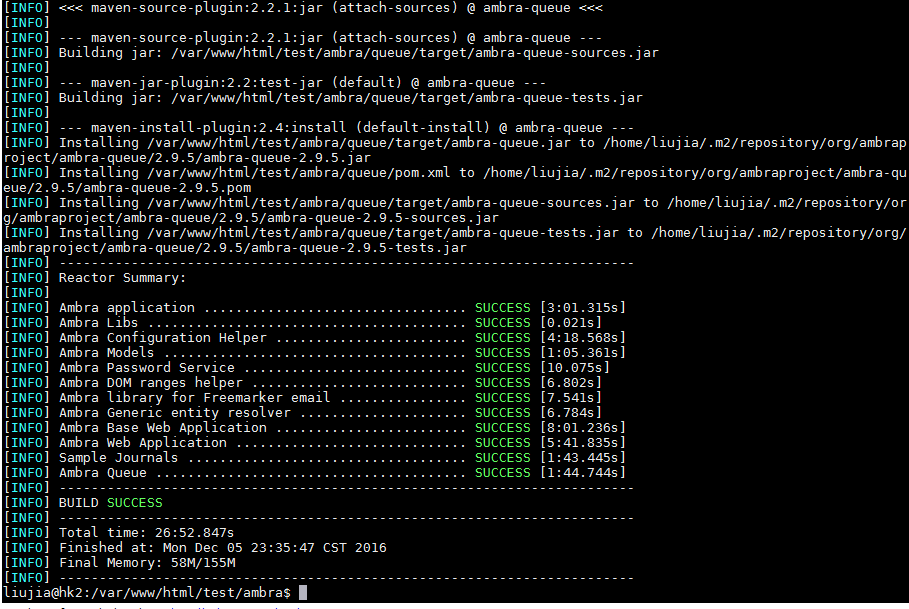
16.测试中,如果用自己编译的ambra-webapp-2.9.5.war,会出现缺少排版的内容页面
bbs-aliyun-dongshan3-303673-7.png

bbs-aliyun-dongshan3-303673-8.png

bbs-aliyun-dongshan3-303673-9.png

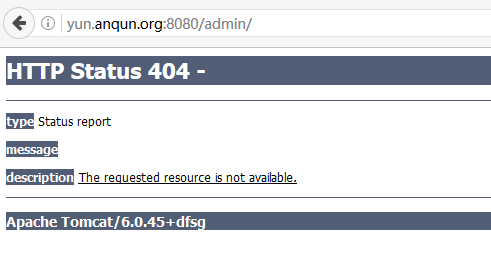
17.虽然官方文档里提到可以直接使用官方编译好ambra-admin.war,但放到webapps后,出现404出错,试用几个不同版本的ambra-amdin.ware,结果一样。
bbs-aliyun-dongshan3-303673-10.png

参考:http://ambraproject.org/trac/wiki/QuickStart
Linux系统远程登录程序MobaXterm简明使用例子

看到云友远程登录Linux系统,使用的程序有 putty,XShell 等,我个人使用的是MobaXterm。各程序有各自的优点,这里我简要写一下MobaXterm的使用例子和一些优点。

对我来说,MobaXterm有几个缺点(当然可能还有很多其它的):

  • 可携带版(Portable edition),下载解压后就可以使用
  • 在Windows 10下,默认的字体看得较明显、清晰,且在Shell里看到的文本信息中,对如警告(WARNING)、信息(INFO)、失败的(Failed)单词会有颜色显示,方便查找

下载、运行

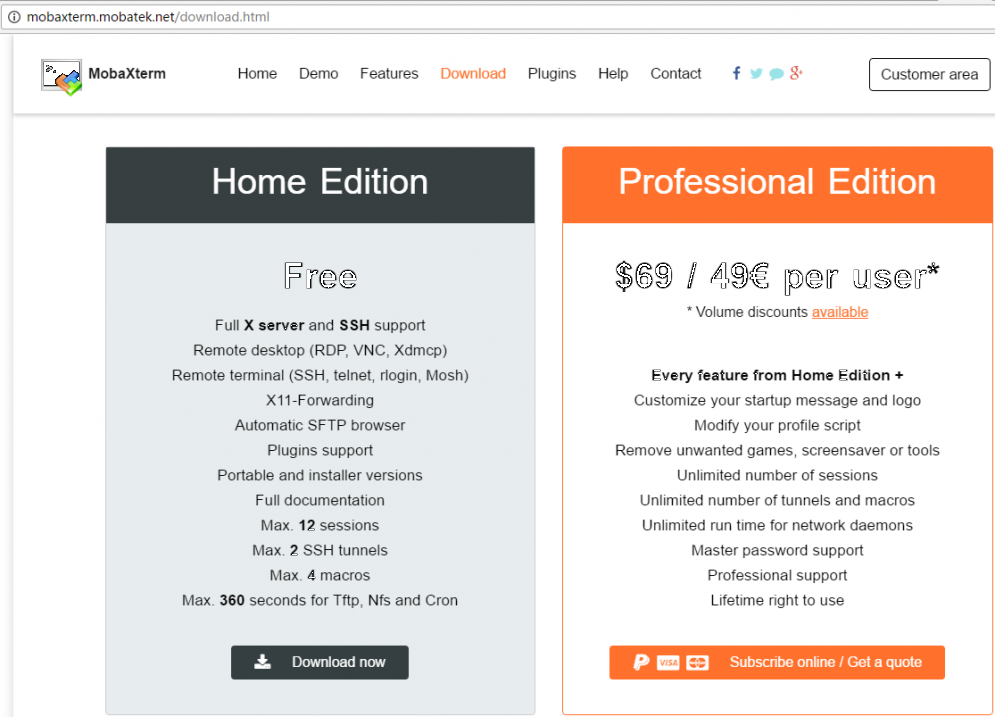
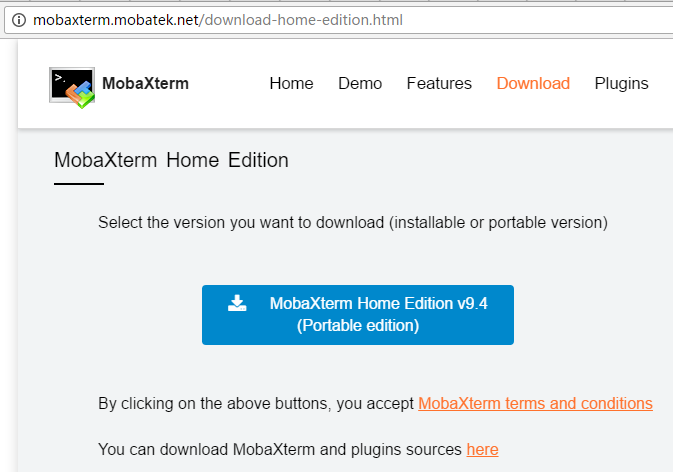
1.从软件官方网站下载家庭版“Home Edition”,再点击携带版“Portable edition”
bbs-aliyun-dongshan3-303243-1.png

bbs-aliyun-dongshan3-303243-2.png

2.将下载得到的.zip文件,解压到自己常用的目录路径,点击其中的“MobaXterm_Personal_9.4.exe”就可以运行了
bbs-aliyun-dongshan3-303243-3.png

新建SSH会话

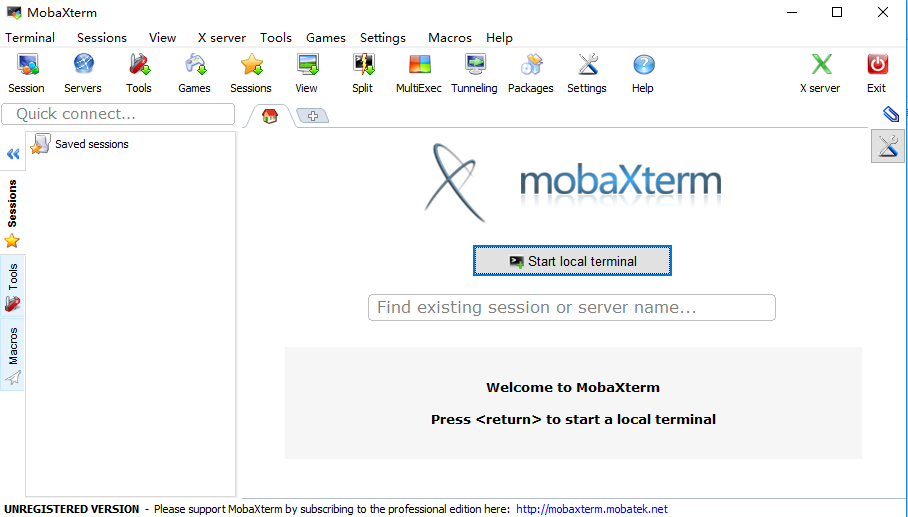
1.运行 MobaXterm
bbs-aliyun-dongshan3-303243-4.png

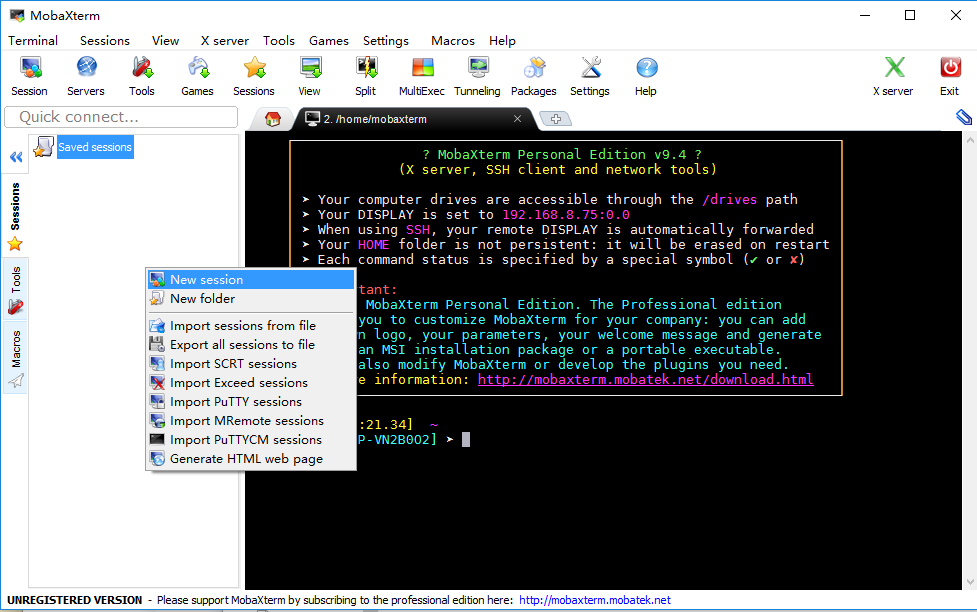
2.在左侧Sessions窗口中,鼠标右击空白处,在弹出的菜单中点击“New session”
bbs-aliyun-dongshan3-303243-5.png

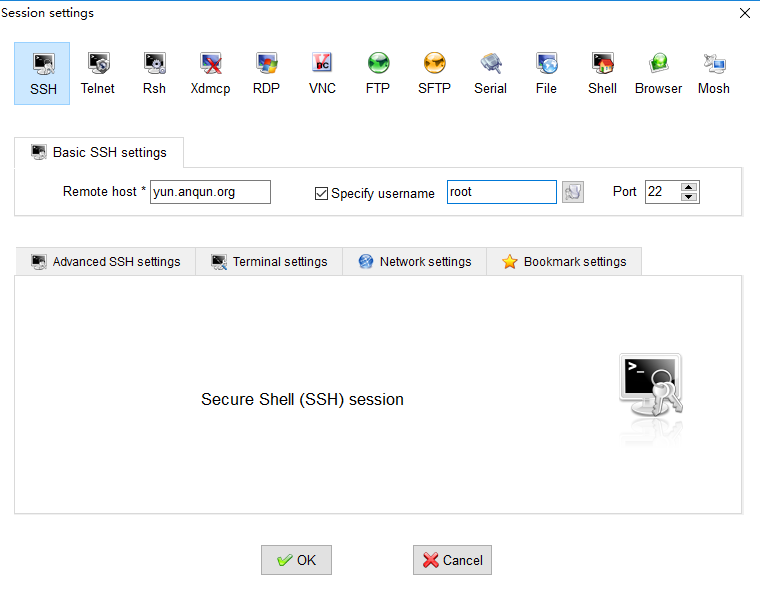
3.在连接的类型中,点击“SSH”的图标,在 Remote host 里填写阿里云ECS的公网IP;勾选“Specify username”,如本例,指定登录名为root用户
bbs-aliyun-dongshan3-303243-6.png

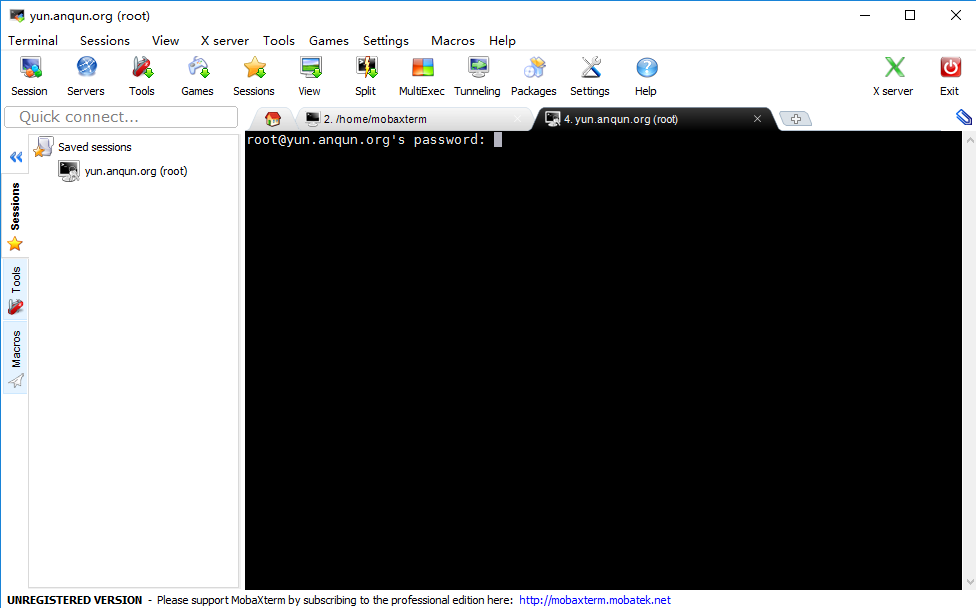
4.点击 OK 按钮后,在光标处会提示输入用户(root)的密码,这时,直接用键盘输入密码后按回车键确认。请注意,在这里,光标不会随着输入密码字符的位置移动,也不会回显星号
bbs-aliyun-dongshan3-303243-7.png

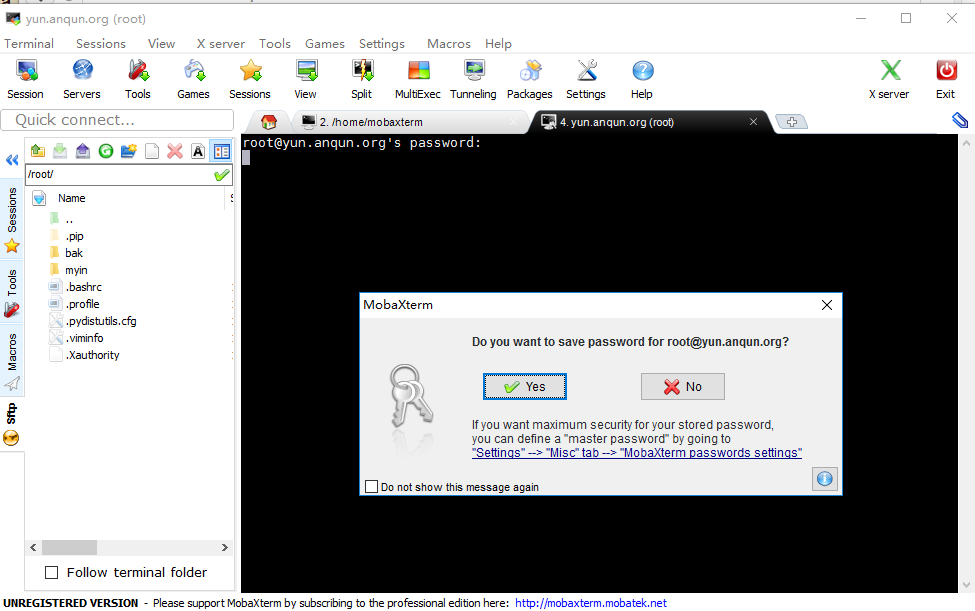
5.MobaXterm会提示是否记住密码,我这里为了方便连接,点击了 Yes
bbs-aliyun-dongshan3-303243-8.png

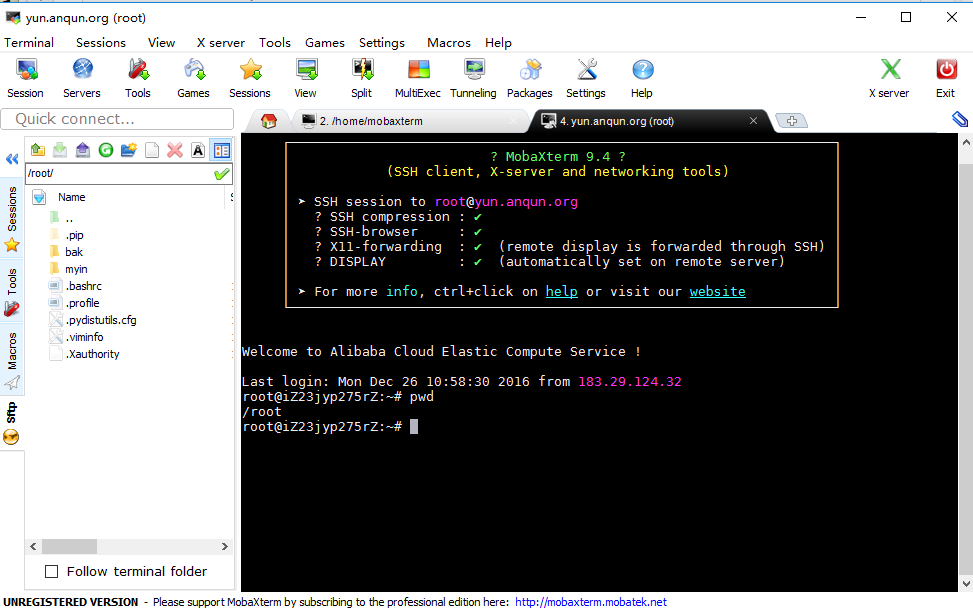
6.成功SSH登录到远程系统
bbs-aliyun-dongshan3-303243-9.png

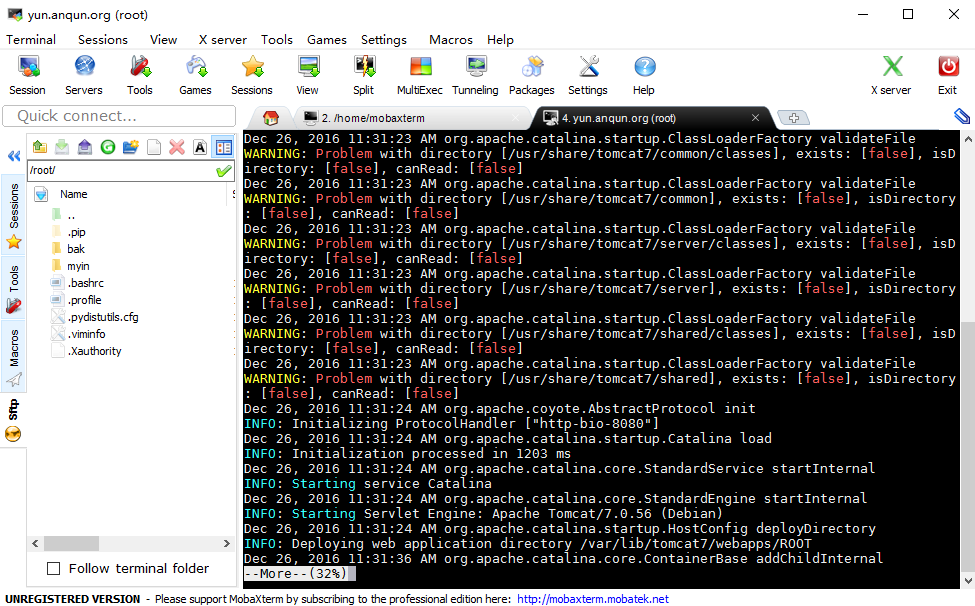
7.查看终端信息时,对如警告(WARNING)、信息(INFO)、失败的(Failed)单词会有颜色显示,如本例查看Tomcat的启动日志文件内容
bbs-aliyun-dongshan3-303243-10.png

常用操作,上传或下载文件(目录)

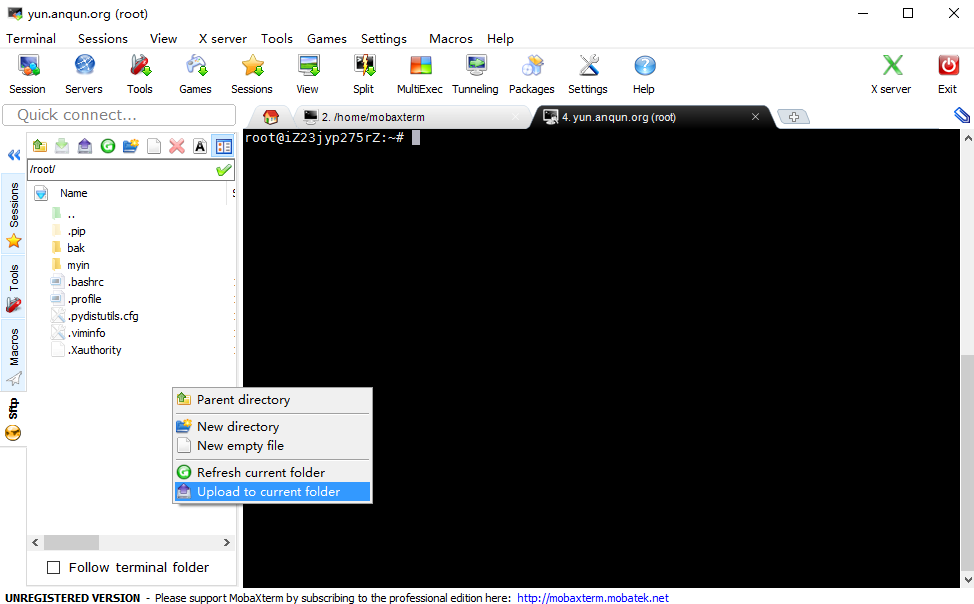
1.鼠标在左侧sftp窗口右击空白处,点击“Upload to cureent folder”,即可将本地的文件上传到目标目录(默认是在/root/);或者直接从本地Windows资源管理器将目录或文件拖放到MobaXterm的sftp窗口
bbs-aliyun-dongshan3-303243-11.png

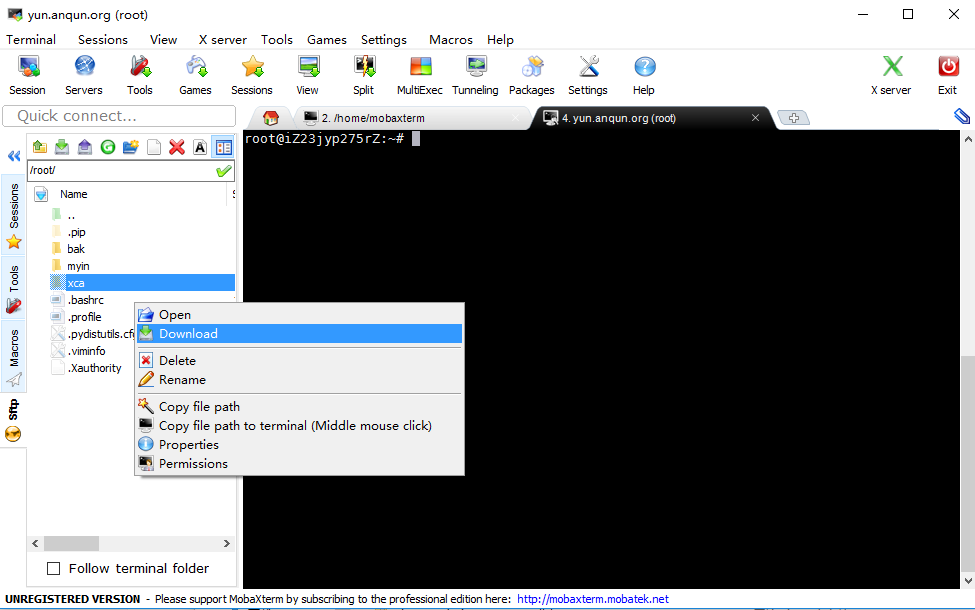
2.如需要从远程文件系统下载文件,在MobaXterm左侧的sftp窗口中选中目录目录或文件,点击鼠标右键 Download 来下载
bbs-aliyun-dongshan3-303243-12.png

常用操作,退出或重新连接会话

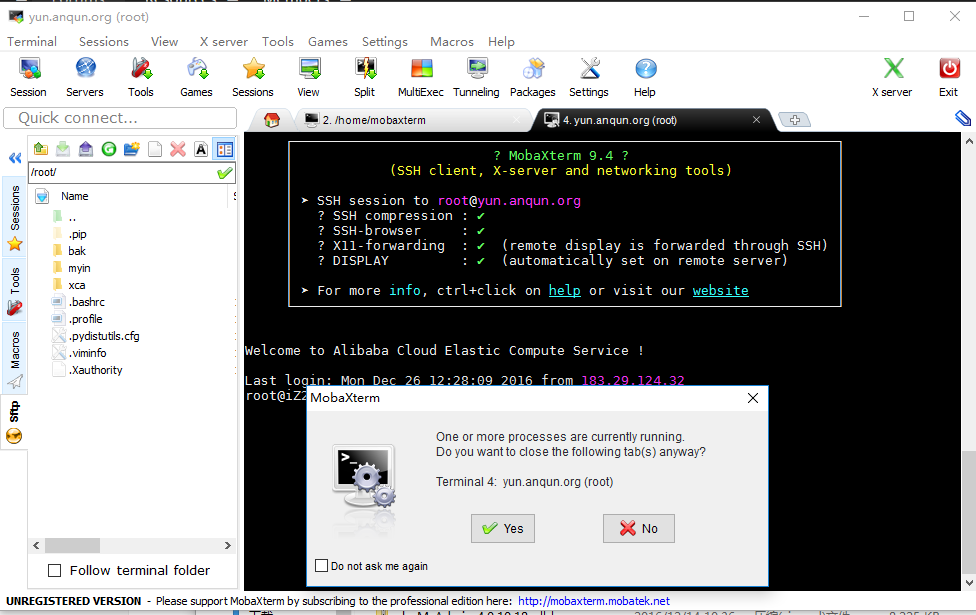
  • 如果直接点击会话标签的x图标,会弹窗提示是否确认退出
    bbs-aliyun-dongshan3-303243-13.png
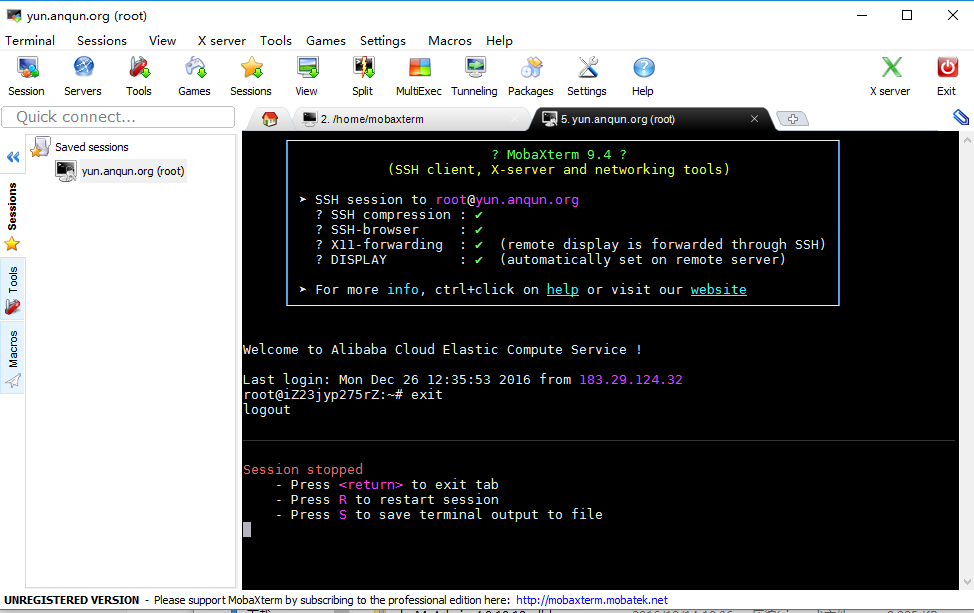
  • 也可以在SSH会话里输入exit的命令退出,按回车键确认退出,或按R重新连接
    bbs-aliyun-dongshan3-303243-14.png
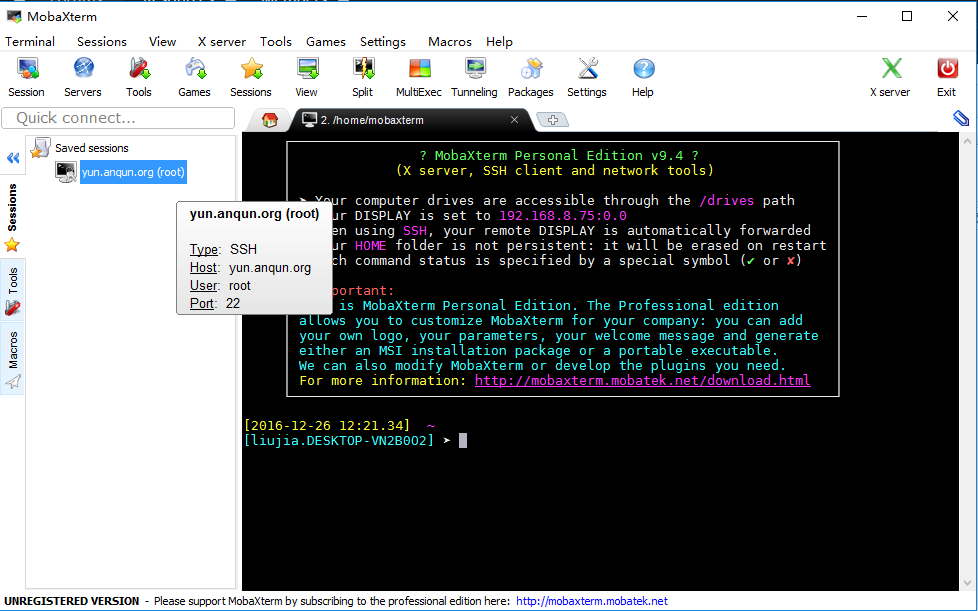
  • 如已经退出SSH会话,可在MobaXterm左侧Sessions窗口中,双击已经保存的会话名称进行连接
    bbs-aliyun-dongshan3-303243-15.png

参考: