在Windows 2008 R2 SP1无人值守安装配置文件Unattend.xml里使用powershell.exe
之前在Windows 2016和Windows 10的无人值守安装文件Unattend.xml里使用powershell.exe,直接这样写 powershell.exe 就可以了。但在Windows 2008 R2 SP1这样写,是不行的。一定要写powershell.exe的完整路径,即 C:\Windows\System32\WindowsPowerShell\v1.0\powershell.exe。
以下是示例:
- 设置administrator密码
- 设置自动登录
- 在防火墙里允许远程桌面连接
- 将活动(插有网线)的网卡重命名(为iEthernet)
- 为名为iEthernet的网卡设置静态IP
- 为名为iEthernet的网卡设置DNS
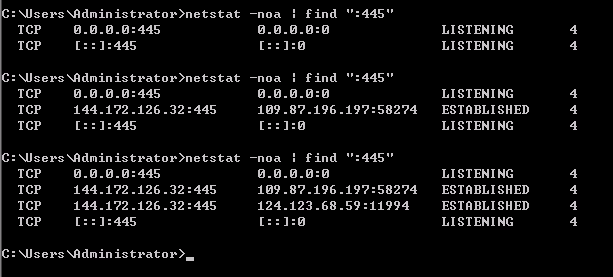
- 不允许外网访问TCP 135,137,139和445端口
<file xml Unattend.xml>
<?xml version="1.0" encoding="utf-8"?>
<unattend xmlns="urn:schemas-microsoft-com:unattend">
    <settings pass="specialize">
        <component name="Microsoft-Windows-Shell-Setup" processorArchitecture="amd64" publicKeyToken="31bf3856ad364e35" language="neutral" versionScope="nonSxS" xmlns:wcm="http://schemas.microsoft.com/WMIConfig/2002/State" xmlns:xsi="http://www.w3.org/2001/XMLSchema-instance">
        </component>
        <component name="Microsoft-Windows-TerminalServices-LocalSessionManager" processorArchitecture="amd64" publicKeyToken="31bf3856ad364e35" language="neutral" versionScope="nonSxS" xmlns:wcm="http://schemas.microsoft.com/WMIConfig/2002/State" xmlns:xsi="http://www.w3.org/2001/XMLSchema-instance">
            <fDenyTSConnections>false</fDenyTSConnections>
        </component>
        <component name="Microsoft-Windows-TerminalServices-RDP-WinStationExtensions" processorArchitecture="amd64" publicKeyToken="31bf3856ad364e35" language="neutral" versionScope="nonSxS" xmlns:wcm="http://schemas.microsoft.com/WMIConfig/2002/State" xmlns:xsi="http://www.w3.org/2001/XMLSchema-instance">
            <UserAuthentication>0</UserAuthentication>
        </component>
    </settings>
    <settings pass="oobeSystem">
        <component name="Microsoft-Windows-International-Core" processorArchitecture="amd64" publicKeyToken="31bf3856ad364e35" language="neutral" versionScope="nonSxS" xmlns:wcm="http://schemas.microsoft.com/WMIConfig/2002/State" xmlns:xsi="http://www.w3.org/2001/XMLSchema-instance">
            <InputLocale>007f:00000804</InputLocale>
            <SystemLocale>zh-CN</SystemLocale>
            <UILanguage>zh-CN</UILanguage>
            <UserLocale>zh-CN</UserLocale>
        </component>
        <component name="Microsoft-Windows-Shell-Setup" processorArchitecture="amd64" publicKeyToken="31bf3856ad364e35" language="neutral" versionScope="nonSxS" xmlns:wcm="http://schemas.microsoft.com/WMIConfig/2002/State" xmlns:xsi="http://www.w3.org/2001/XMLSchema-instance">
            <AutoLogon>
                <Password>
                    <Value>xinNIANhao2019</Value>
                    <PlainText>true</PlainText>
                </Password>
                    <Enabled>true</Enabled>
                    <LogonCount>2</LogonCount>
                <Username>Administrator</Username>
            </AutoLogon>
            <FirstLogonCommands>
                <SynchronousCommand wcm:action="add">
                    <CommandLine>C:\Windows\System32\WindowsPowerShell\v1.0\powershell.exe -command "$wmi = Get-WmiObject -Class Win32_NetworkAdapter -Filter "netconnectionstatus=2"; $wmi.NetConnectionID = 'iEthernet'; $wmi.Put()"</CommandLine>
                    <Description>rename nic name</Description>
                    <Order>1</Order>
                </SynchronousCommand>
                <SynchronousCommand wcm:action="add">
                    <CommandLine>netsh interface ip set address name="iEthernet" static 144.172.126.32 255.255.255.0 144.172.126.1 1</CommandLine>
                    <Description>set static ip address</Description>
                    <Order>2</Order>
                </SynchronousCommand>
                <SynchronousCommand wcm:action="add">
                    <CommandLine>netsh interface ip set dns name="iEthernet" static 8.8.8.8</CommandLine>
                    <Description>set dns server</Description>
                    <Order>3</Order>
                </SynchronousCommand>
                <SynchronousCommand wcm:action="add">
                    <CommandLine>netsh advfirewall firewall add rule dir=in action=block protocol=TCP localport=135 name="Block_TCP-135"</CommandLine>
                    <Description>Block_TCP-135</Description>
                    <Order>4</Order>
                </SynchronousCommand>
                <SynchronousCommand wcm:action="add">
                    <CommandLine>netsh advfirewall firewall add rule dir=in action=block protocol=TCP localport=137 name="Block_TCP-137"</CommandLine>
                    <Description>Block_TCP-137</Description>
                    <Order>5</Order>
                </SynchronousCommand>
                <SynchronousCommand wcm:action="add">
                    <CommandLine>netsh advfirewall firewall add rule dir=in action=block protocol=TCP localport=139 name="Block_TCP-139"</CommandLine>
                    <Description>Block_TCP-139</Description>
                    <Order>6</Order>
                </SynchronousCommand>
                <SynchronousCommand wcm:action="add">
                    <CommandLine>netsh advfirewall firewall add rule dir=in action=block protocol=TCP localport=445 name="Block_TCP-445"</CommandLine>
                    <Description>Block_TCP-445</Description>
                    <Order>7</Order>
                </SynchronousCommand>
                <SynchronousCommand wcm:action="add">
                    <CommandLine>netsh advfirewall firewall add rule dir=in action=allow protocol=TCP localport=3389 name="Allow_TCP-3389"</CommandLine>
                    <Description>Allow_TCP-3389</Description>
                    <Order>8</Order>
                </SynchronousCommand>
            </FirstLogonCommands>
            <UserAccounts>
                <AdministratorPassword>
                    <Value>xinNIANhao2019</Value>
                    <PlainText>true</PlainText>
                </AdministratorPassword>
            </UserAccounts>
            <OOBE>
                <HideEULAPage>true</HideEULAPage>
                <SkipMachineOOBE>true</SkipMachineOOBE>
            </OOBE>
            <TimeZone>China Standard Time</TimeZone>
        </component>
    </settings>
    <cpi:offlineImage cpi:source="catalog:d:/temp/install_windows server 2012 r2 serverdatacenter.clg" xmlns:cpi="urn:schemas-microsoft-com:cpi" />
</unattend>
图1:安装好系统后,可以查看 C:\Windows\panther\Unattend.xml 文件内容,回看设置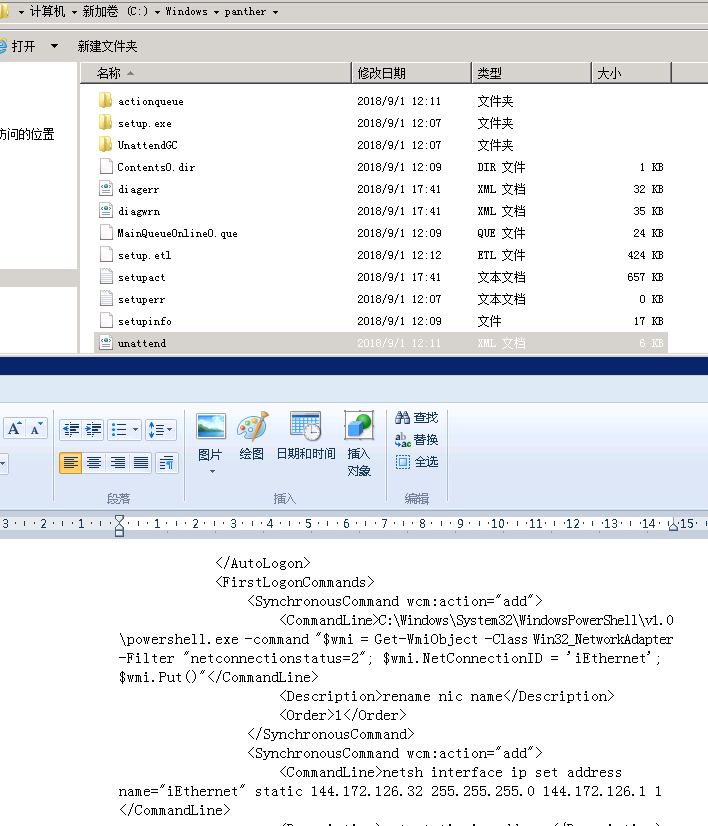
图2:C:\Windows\panther\UnattendGC\setupact.txt 可以查看无人值守安装准备内容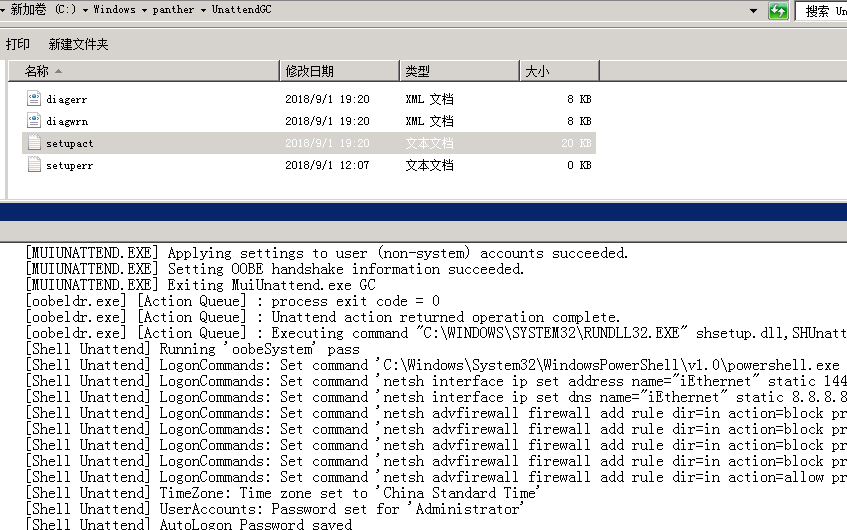
参考:
- https://social.technet.microsoft.com/Forums/windows/en-US/19e79485-a4ba-4305-a3ff-2c4f981ecdfd/trying-to-use-powershell-script-with-quotsynchronouscommandquot-section-in-unattend-file?forum=winserversetup
- https://blogs.technet.microsoft.com/heyscriptingguy/2014/01/14/renaming-network-adapters-by-using-powershell/

